Thank You for Using PC-Doctor Service Center!
Use this getting started guide to immediately begin diagnosing issues with your PC, Apple, ChromeOS, and Android devices, and perform NIST 800-88r1 drive erasures on your ATA, NVMe, eMMC, or SCSI/SAS drives.
For more detailed information, please see the Service Center User Guide located in the Documentation subfolder on the Multipurpose USB Device.
PC-Doctor Test Environments
Service center consists of multiple diagnostic test environments, which offer support for the following platforms.
| Test Environment | Personal Computers | Apple Computers | ChromeOS Computers | Android Devices |
| Windows |
Windows 10-11 and Server 2016-2022 (x86-64) Windows 11 (ARM) |
|||
| Bootable Diagnostics | UEFI & non-UEFI x86-64 systems with 256MB+ RAM | Intel-based Macs | ||
| ChromeOS | x86-64, ARM, and ARM64/AARCH64 | |||
| Android | Android 6.0 - Android 13.0 |
Starting Diagnostics
All test environments will provide basic diagnostic test scripts on their home pages that will help you begin the testing process. For more information about the available test scripts as well as instructions to create your own customized scripts, please see the Service Center User Guide located in the Documentation subfolder on the Multipurpose USB Device.
Windows
To get started using the Windows test environment:
- Boot into a Windows system and login.
- Insert the Multipurpose USB Device into a USB port.
- If autorun is not enabled, navigate to the USB drive and run Setup.exe.
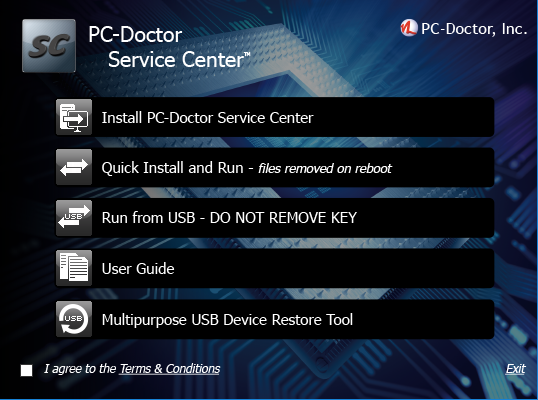
You will be presented with the following Setup menu.

To access the Service Center for Windows test environment, choose one of the first three options.
- Install PC-Doctor Service Center will install the product onto the machine. This is useful if you plan to routinely use the Windows test environment on a machine.
- Quick Install and Run is similar to a full installation, but it will uninstall the software when the system reboots.
- Run from USB/DVD is the most common approach to access the Windows test environment without the need to install.
Additionally, the setup menu provides access to:
- User Guide is the complete product documentation. It fully describes how to use the software across all test environments and supported machine types.
- Multipurpose USB Device Restore Tool provides a quick way to factory reset the Multipurpose USB Device.
Bootable Diagnostics
Bootable Diagnostics provides a test environment for PCs and Apple Intel-based Macs.
To use Bootable Diagnostics, you must configure your computer to boot from the Multipurpose USB Device.
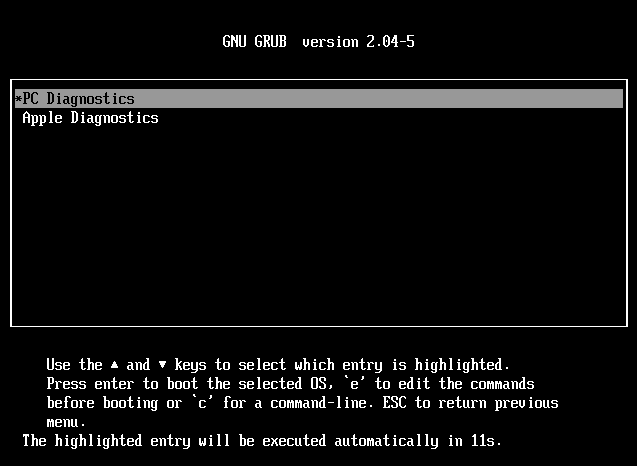
Once the system boots from the Multipurpose USB Device, you will be presented with a boot menu of options.

Select PC Diagnostics if you are running on a PC, or select Apple Diagnostics if you are running on an Intel-based Mac.
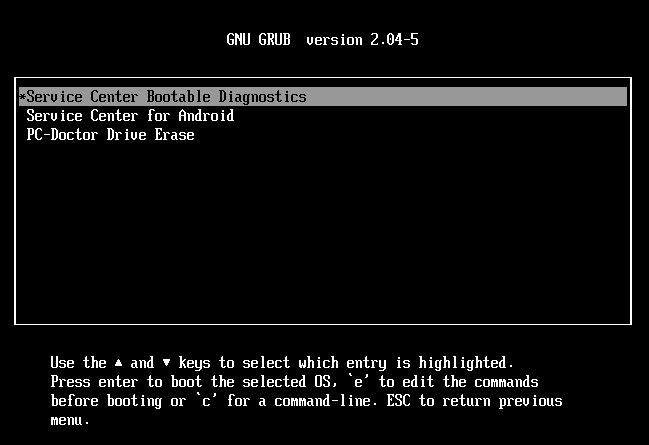
On the next boot screen, select Service Center Bootable Diagnostics.

On the final boot screen, select the first option to continue booting into Bootable Diagnostics. Note: if the system fails to boot, use the video fallback option.
ChromeOS
The ChromeOS test environment is provided to test computers and tablets running Google's ChromeOS.
To use the ChromeOS test environment:
- You must first configure the device to be in Developer Mode. For more information on how to put a ChromeOS device into Developer Mode, please see the Service Center User Guide located in the Documentation subfolder on the Multipurpose USB Device.
- After the device has restarted in developer mode, follow on-screen prompts to connect to a network, and then login by selecting the "Browse as guest" option.
- Once you've logged in to ChromeOS, press Ctrl+Alt+T to open a ChromeOS shell (crosh).
- Plug in the Multipurpose USB Device to an available USB port.
- Enter these commands:
- shell
- cd /media/removable/PC_DOCTOR
- bash launchChromebookDiagnostics.sh
Note: if the command 'shell' fails with the error, "ERROR: unknown command: shell," it means the device is not in developer mode.
After you have completed diagnostics, you will want to disable developer mode.
Android
The Android test environment is provided as an Android app (APK) that is sideloaded to the devices from a host PC.
Using the Android test environment is a two-step process:
- The Android device must be put into Developer Mode, configured to have USB Debugging enabled, configured to allow 3rd party applications not on the Google Play Store to be installed, and the device must be connected via USB to a host PC.
- The host PC must boot into Bootable Diagnostics using the boot menu option PC Diagnostics > Service Center for Android.
For more information on how to configure an Android device, refer to Google Android documentation or the device manufacturer's documentation.